First thing first, please make sure you have all the required information about the new outlet to be added. You can refer to the KFC – Outlet details spreadsheet for the data format.
You’ll also need the API url of the outlet LS so that website can send the KOT order to the outlet POS. The URL would like following:
http://webnp.kfc.com.np:1007/WEBSRV/WS/Devyani%20Intl%20Nepal%20Pvt_Ltd/Codeunit/HospitalityFunctions
You can find the additional details in the same spreadsheet under Outlet API information tab
Make sure the LS API URL is accessible. Simply hit that URL in browser and it should ask for the credentials.
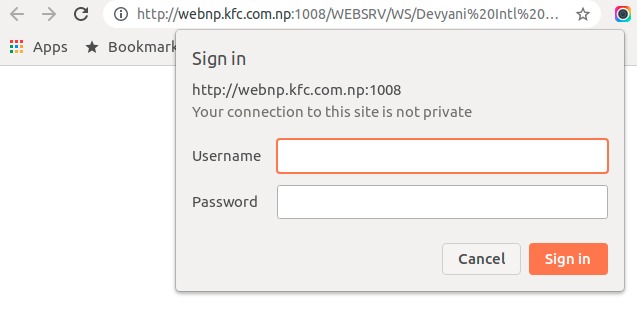
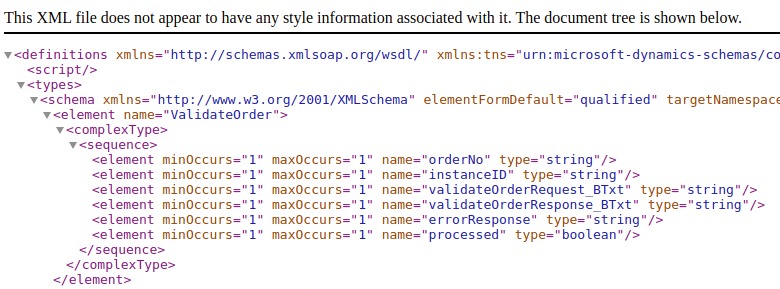
Submit the credentials and following kind of XML should load.
Once you have above information ready and verified, you can then proceed to adding the outlet on the website.
Website Admin Panel
Once you’ve logged in, you’ll be in the admin dashboard.
Outlet via product tag
- Go to Products > Tags
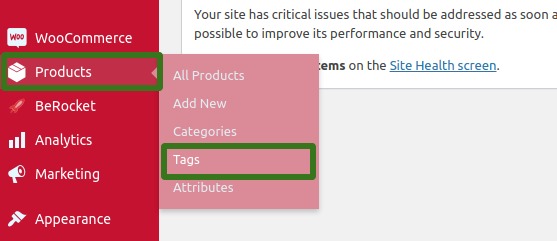
2. Fill up the new tag form
Name: Outlet name provided by client. But you can update it if need be to maintain the consistency. Follow format “KFC [space] Location” like KFC Durbarmarg, KFC Labim, etc.
Slug: Put the outlet code in the slug. It should be small case. You might be provided with code like NPK001, NPK007 etc. but you put npk001 in the slug field.
Description: Leave it empty.
Create outlet in Store Locator
- Go to A Store Locator > Manage stores
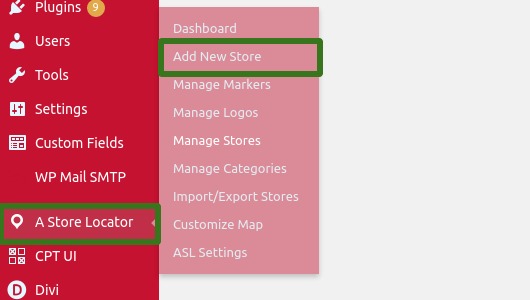
- Fill in the outlet details as provided in the spreadsheet.
- For description, fill in the outlet code of the store.
Please fill in capital case like NPK001.
(Check existing outlet info if need be to avoid confusion.)
That is all for now in admin panel. Now let’s look into what needs to be done at the code level.
Changes in code
Since the functionality for sending order from WooCommerce to KFC KOT is built in the theme itself, any code changes required are done in the theme KFC Nepal (public_html/wp-content/themes/kfcnepal).
Outlet LS port mapping
File: kfcnepal/woo-kot/kot-api/class-kfc-soap.php
Function: getOutletUrl($outlet_id)
Purpose: This decides which LS server is the order is to be sent based on the outlet selected by the user.
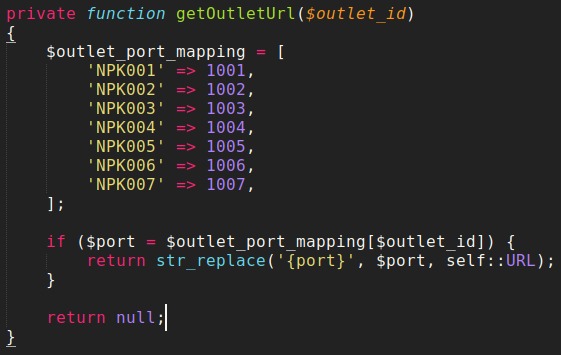
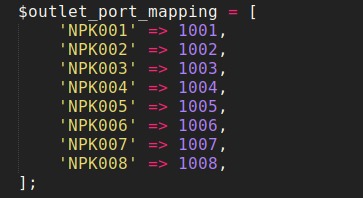
Add new outlet port at the bottom of the array. Let’s assume new outlet code is NPK008 and port to it’s LS is 1008. Then the array would look like below.
LS API status monitoring
File: kfcnepal/woo-kot/woo-kot-cron.php
Function: outletsDownDetector1() or outletsDownDetector2()
Purpose: These functions check if any of the LS API is down every 15 minutes. It’ll then send the email notification with the list of down API URLs.
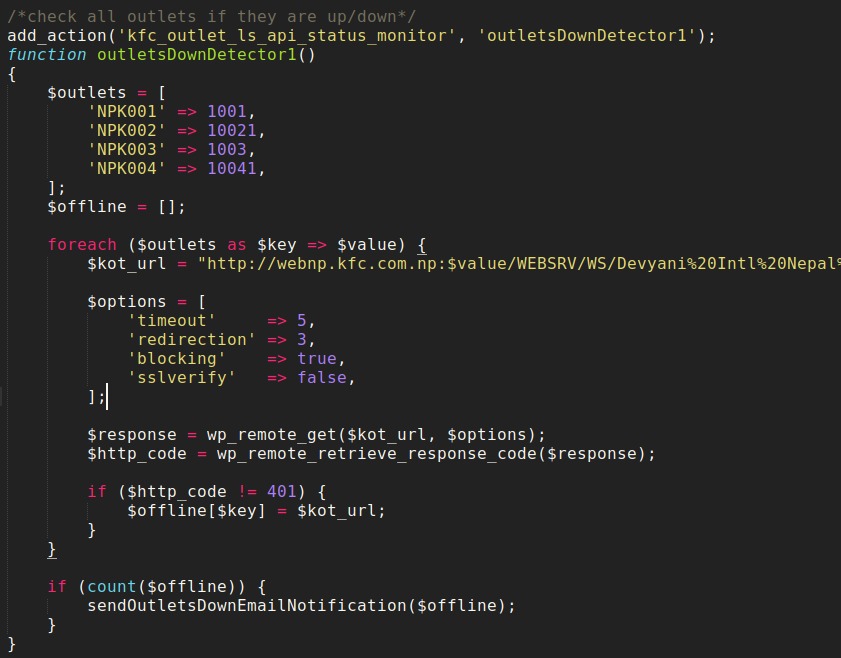
All you need to do is add new outlet code and port like you did in LS port mapping above.
The reason we have two functions to monitor is to balance the execution time required and prevent the process dying before it can check all outlets listed in the array.
So the objective here is to evenly divide the outlets in two functions like 4-4, 5-5 as long as possible.
Enabling outlet for menu items
Go to dashboard and find Products > All products
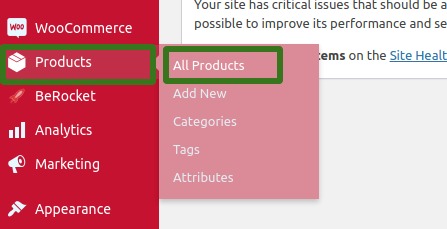
Select bulk edit
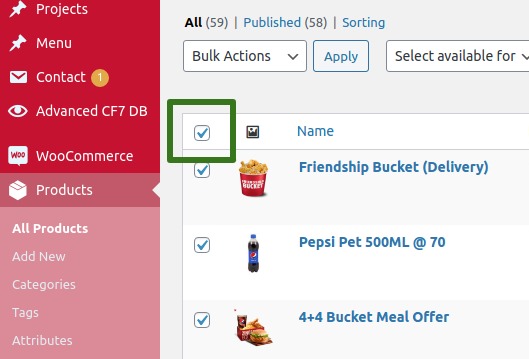
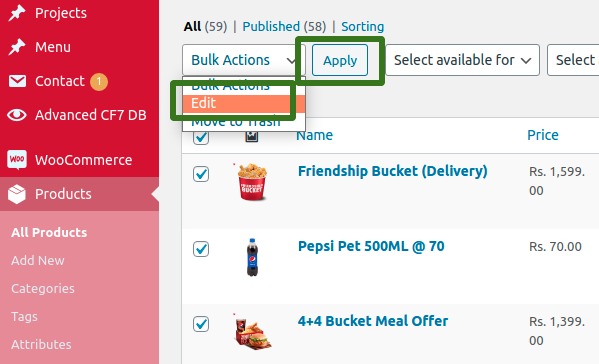
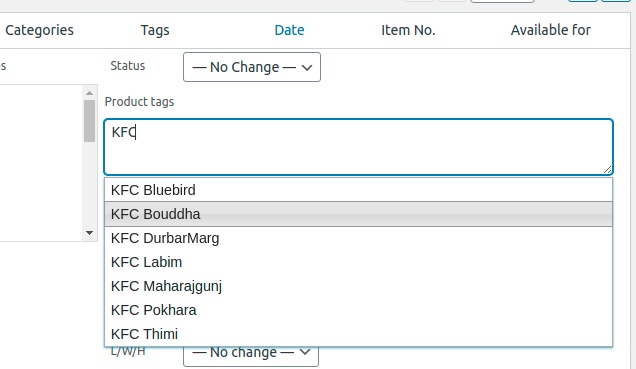
In the “Product tags” field, Type KFC and from the suggested drop down, select the newly added outlet and click Update button.
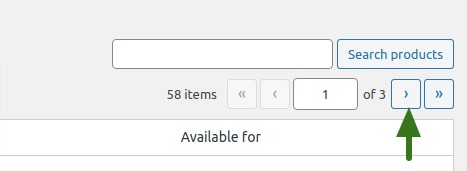
You’ll need to do this in multiple times as there are paginated data.
For that, simply navigate using pagination buttons and repeat above steps.
Sending test orders
Once all of the steps are completed, you’ll need to send the test order in that store.
You need to make sure the receipt number is received in order view page. Also the KOT need to be confirmed with someone physically at the store.
Creating a new user for new outlet
Finally, you need to create a user who can check the orders received in that outlet.
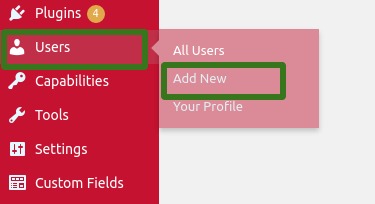
Go to the dashboard > Users > Add New
Fill in the form with the information you have.
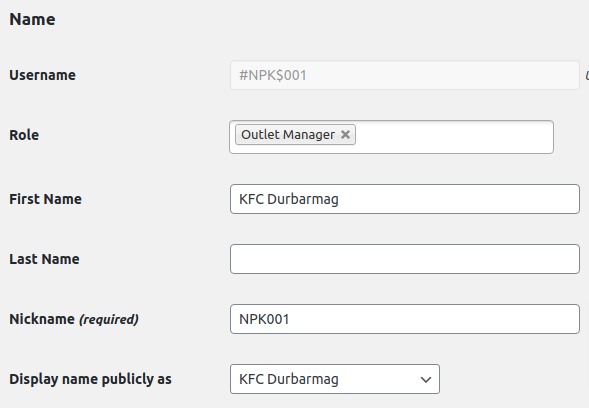
Important notes:
- Match the username pattern like #NPK$001
- You might need to do this via phpMyAdmin
- Role should be Outlet Manager
- Outlet email is required
Save the information and credentials in KFC – Outlet details > Outlet credentials.